Lesson 2: Relaxation Exercise (Part 4)
Teaching Objectives:
Introduces simple relaxation exercises and teaches students how to use relaxation skills to relieve tension and stress and develop a 'relaxation response'. This lesson introduces varies relaxation exercises as coping skills to lower the stress level of the individual and worry less about their life.
Review the content in previous class
- Mantra Meditation
- Peaceful Scene
- Ask student to do the demostration
- Did they use this skill in last 7 days? Ask student to share their story.
Progressive Muscle Relaxation
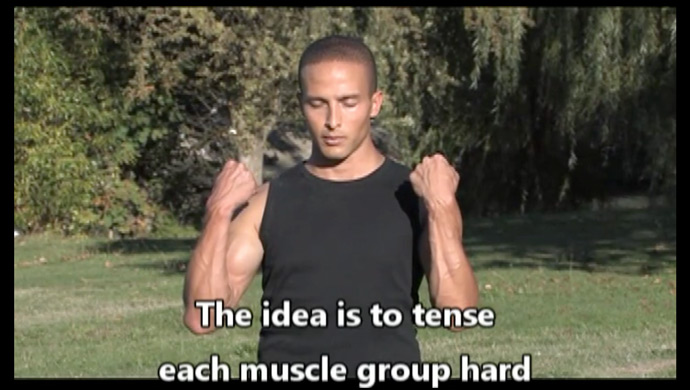
Progressive muscle relaxation is intended to help you release chronic tension, as you may not fully recognize that you are experiencing psychological and physical stress from the anxiety in your body. By tensing and releasing muscle groups in a particular order, you will be able to tell when your muscles are tight and when they are relaxed. The idea behind this practice is to tighten each muscle group (but not to the extent which will cause an injury) for about 10 seconds, slowly relax and then give yourself another 15-20 seconds to rest before going on to the next muscle group. You must pay attention to how you feel when relaxing your muscles, and not when you tighten them.
You should start with 16 muscle groups, and it is only with regular practice and learning how your body’s relaxed state feels, that you will be able to reduce the number of muscle groups. You will also then be able to do groups of muscles instead of one group at a time.
The instructions below start with the order for all 16 muscle groups, which can reduce with regular practice, but you need to find a place and time to practice and complete the exercise.
Teaching guide
2. Teacher invite student coaches to demostrate the exercise in front of other students.
3. Point out areas that need attention:
- Do it slowly
- When you tighten up a muscle group, hold it for a few seconds and then relax
- Repeat 5 times for every muscle group
- Relax for 10 seconds before next muscle group
- Your muscles can feel the different of tighten up and relax.
4. Afterward, teacher invites students to share their feelings.
Instructions:
- Sit, stand or lie down in a comfortable position.
- Tense and release 16 muscle groups in turn. Tense moderately and do not strain yourself. Hold the tensing for 7 to 10 seconds. You may wish to use 1001, 1002, 1003 as a form of counting.
- Focus on what is happening and feel each muscle group’s increasing tension. Visualizing on the muscle group you are tensing will help keep your focus.
- When you release each muscle group after tensing, does it quickly and then relaxes? Enjoy the sudden feeling of relaxation for at least 15 to 20 seconds before continuing with the next muscle group.
- Focus on one set of muscles and keep all other muscle groups in a relaxed state.
- Tense and relax each set of muscles once. If a group is a particular tense, you can tense and relax two to three times. Wait 20 seconds between each tensing and relaxing.
Find a peaceful and comfortable environment and follow the instructions below:
- To begin, take three deep breaths with the abdomen. Exhale slowly each time. When you exhale, imagine the tension flowing from your body.
- Hold your hand in a fist for 7-10 seconds, then relax for 15-20 seconds. Follow this same tensing and relaxing sequence for all muscle groups, hereafter indicated as ‘Tense and relax’.
- Pull the forearm up close to the ‘shoulder’ and tighten your ‘biceps’. Tense and relax.
- Tighten your ‘triceps’ (the lower arm muscles) - straighten your arm and lock your elbows. Tense and relax.
- Raise your eyebrows as much as possible to tighten the muscles of your forehead. Tense and relax. Imagine your forehead muscles becoming smooth and soft when relaxed.
- Close your eyes and tighten the muscles around them. Tense and relax. Imagine all the muscles around your eyes in a state of deep relaxation.
- With your mouth open, tighten the jaw muscles by stretching the muscles around the joints of the jaw. Tense and relax. Let your lips part, allowing your jaw to relax.
- Sit up straight; tighten the muscles behind your neck by tipping your head back to touch your back. This movement should be gentle enough to avoid neck damage. Focus is tensing only on your back neck muscles. Tense and relax.
- Take a few deep breaths, and while maintaining your head position, rest the weight of your head on your shoulders.
- Bring your shoulders up towards your ears, tensing the shoulder muscles. Tense and relax.
- Pull your shoulder muscles back, chest out and tighten the back shoulders as if someone is hitting between your shoulder blades. Tense and Relax. Repeat this exercise often as this muscle group is particularly tense.
- Take a deep breath to tightening your chest muscles. Tense and Relax. Imagine that stress is flowing out as you relax.
- Inhale inward through your abdomen to tighten your abdominal muscles. Tense and Relax. Imagine the feeling of relaxation spreading throughout your entire abdomen.
- Bend your knees and twist left and right to tighten lower-back muscles. (Omit this step if you have lower-back pain). Tense and Relax.
- Tighten your buttock muscles. Tense and Relax. Imagine your hip muscles becoming loose and soft.
- Straighten your knees and legs by tightening your thigh and hip muscles through your pelvis. Tense and Relax. Feel the smoothness of your completely relaxed thigh muscles.
- Bend your toes upwards with the heels pointing outwards to tighten your calf muscles (bend carefully to avoid cramps). Tense and Relax.
- Point your toes down to tighten your foot. Tense and Relax.
- If a particular muscle group is still tight, repeat the exercise once or twice maintaining the tensing and relaxation cycle.
- Imagine the feeling of relaxation slowly spreading throughout your body, starting with the muscles in your head right down to your toes.
Quiz for lesson "Relaxation Exercise"
Ask students to login student account and complete the 10-question quiz.
Teaching guide
2. Ask student to login their individual account (ideally one device per student)
3. Invite student coaches to help others student if they need help
4. Allow student to complete the quiz by themselve in 5-10 mins
5. if student still can't get passing score, teacher could go through all the questions together with all students.